Where a new report is created which requires the entry of additional parameters to those used in the LabHQ default report templates, the report may be uploaded as a custom report type. The custom report type details store the information on where to get the specific data each time the custom report is generated.
A new custom report type may be created by accessing the Custom Report Types set-up page via Reports > Report Settings > Custom Report Types menu.
All existing live custom report types are displayed in the left hand pane under the Live tab. To create a new custom report type, select the + button and type in a custom report type name that does not already exist in this LabHQ instance. On entering a new custom report type the OK button will become active. On selecting OK the Custom Report Types set-up page is displayed again.
The Details tab holds the custom report type details, including Name entered when adding the custom report type, Description and parameter information (See Figure 69 below). The Default Printer selection allows the assignment of a default printer for the custom report type. If a default printer is set, this printer will automatically be selected in the Custom Report dialog on generating the report. Alternatively, if a default printer is not selected, the user will be required to select a printer from a list of available printers when generating the report. There is also an option to enable the custom report type for a workflow. This means that the custom report type will be available to assign as a report print step at Workflow set-up (see Workflow Management). If this setting is left unticked, the custom report type will not appear in the Report Type options when adding a print step to a workflow.
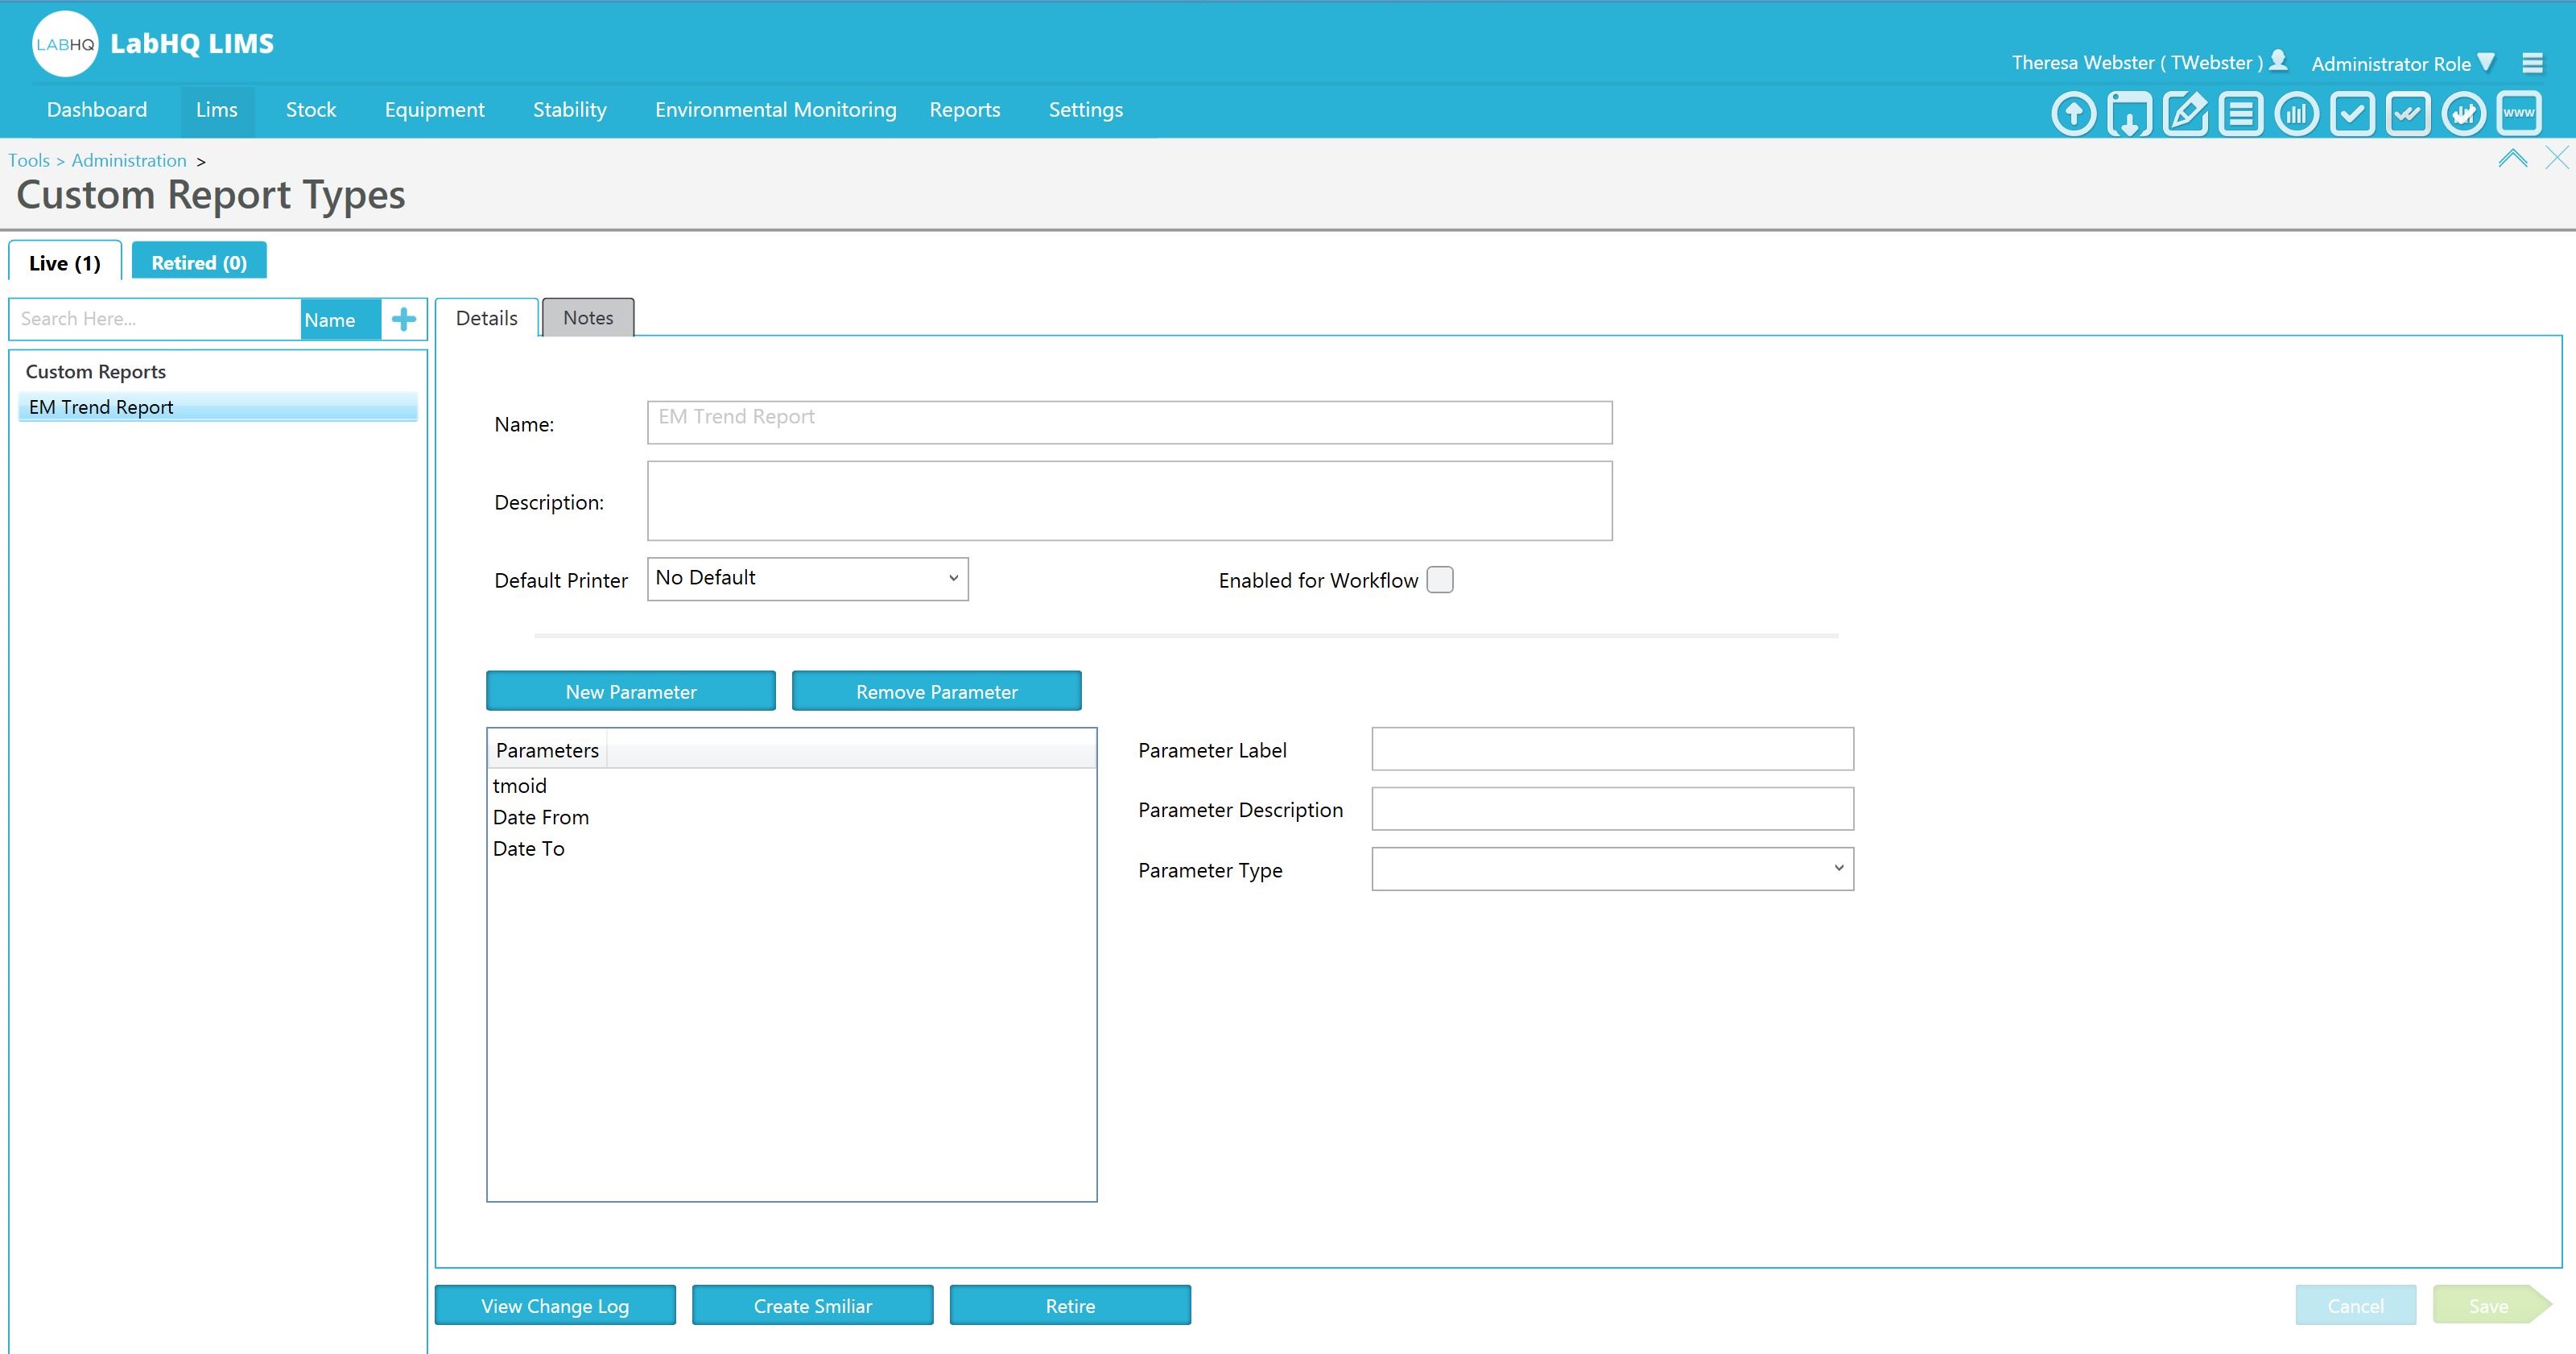
Figure 69: Custom Report Type Management
To create a report parameter, select the New Parameter button above the Parameters box. When a new report parameter is created, it will automatically be added to the Parameters box. Highlighting the new parameter will allow for editing of the Parameter Label, Parameter Description and Parameter Type fields on the right. The Parameter Label is a mandatory field and should be used to enter the parameter exactly as it set-up within the report template in Crystal Reports. Note: if the report template parameters and custom report type parameters do not match, the report will not be generated correctly. The Parameter Description field can be used to assign the name of the parameter as it will appear to the user when generating the report. The Parameter Type field contains a list of available parameter types. Parameters for certain data types, e.g. Products, Jobs and Samples, are available in the list and selecting one of these parameter types will allow the user to select from a list of IDs within LabHQ related to the data type. If the required parameter type is not included within the Parameter Type list, the Integer and Text options may be used to allow the entry of a numeric or string value of the data required on the report.
Notes can also be assigned to a custom report type via the Notes tab. For more information on the Notes functionality, see the Notes section in General Static Data Management. This function is optional per custom report type and is not a mandatory field to allow save.
A report parameter may be removed by highlighting the parameter in the Parameters box and selecting Remove Parameter.
To modify custom report configuration, an existing custom report type is selected from the left hand pane on the set-up page.
The existing custom report type details will then be displayed and may be modified in the same manner as creating the custom report type, described in the previous section. Use Cancel to cancel the modification process and Save to save any changes made. On saving modified data, the user will be prompted to enter a reason for change and this will be recorded in the audit trail event.
In addition there are a number of other options:
View Change Log – generates an audit trail report for the selected custom report type record. The report is generated in a separate window as a PDF file.
Create Similar – allows a new custom report type to be created based on the same data as the current custom report type selected.
Retire – retires the custom report type so that it may no longer be used (the record is not actually removed from the system). A reason for retiring the custom report type must be entered.


